How to Crip Walk: Step-by-Step Beginner Tutorial
The Crip Walk looks impossibly fast in clips, but the dance is built from three movements: the V-step, the shuffle, and the heel-toe. Learn those three cleanly and everything else is a variation, a transition, or a matter of speed. That is the whole curriculum.
This is a step-by-step guide written for someone who has never done it. We will go through what you need before you start, break each movement down into its individual weight shifts, give you a four-week practice plan, and cover the specific mistakes that keep beginners looking stiff. If you want the background on what the dance actually is and where it came from, read what the Crip Walk is first — this page is purely about how to do it.
Before You Start: Shoes, Surface, and Space
The Crip Walk is a swivel dance. Almost every movement involves rotating on the ball of the foot or the heel while your weight is on it. That makes your shoes and your floor more important than they are in most other street dances, and getting them wrong will make you think you lack coordination when you actually just lack traction control.
Shoes
You want a flat, smooth sole with a low profile. Classic canvas skate shoes, low-top leather sneakers, and thin-soled basketball shoes all work. What you want to avoid is the modern running shoe: thick foam midsole, aggressive tread, flared heel. That construction grips the floor exactly when you need to pivot and lifts your ankle far enough off the ground that small balance corrections turn into big ones. If your foot catches mid-swivel, it is usually the shoe, not you.
Surface
Smooth hard flooring: wood, sealed concrete, linoleum, a smooth garage floor. Do not learn this on carpet. Carpet stops the swivel dead while your body is still rotating, which at best kills the movement and at worst twists your knee. A freshly polished or wet floor is the opposite problem — you need predictable grip, not zero grip.
Space and warm-up
You need roughly two metres of clear floor in one direction. The dance travels sideways, and beginners underestimate how far they drift once the shuffle gets going. Spend two or three minutes warming up your ankles and calves before you start: slow ankle circles in both directions, then rise onto the balls of your feet and back down fifteen or twenty times. Nearly all of the load in this dance sits on the ankle and the calf, and cold ankles are how people end up with a sore Achilles after a first session.
Step 1: The V-Step (Your Foundation)
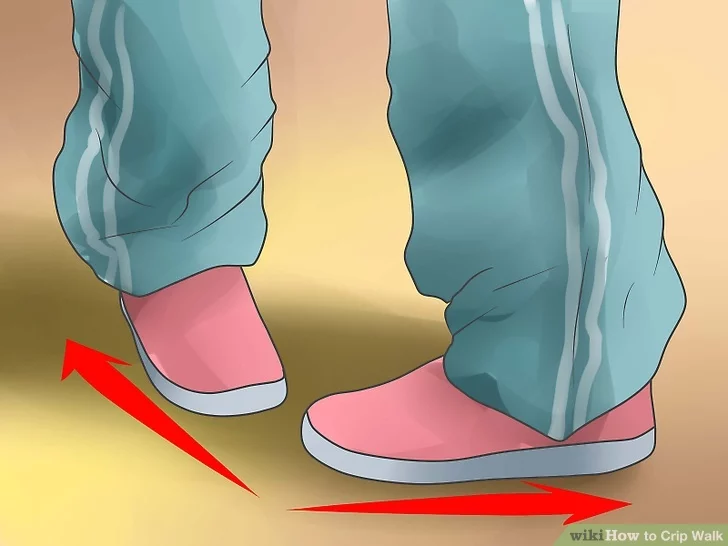
The V-step is the movement that gives the dance its name and its shape. Everything else is layered on top of it, so do not rush past it.
The position: stand with your heels touching and your toes pointed outward, so your feet form a V. Knees soft, not locked. Weight on the balls of your feet.
The movement: keeping your weight forward, swivel both feet at once so the toes come together and the heels swing out. You are now in an inverted V — a caret shape. Then swivel back to the original V. That alternation, V to inverted V and back, is the whole step.
How to drill it: do it slowly, without music, twenty times in a row. You are looking for two things. First, both feet should turn at the same moment; beginners almost always move one foot fractionally before the other, which reads as a stumble. Second, your heels and toes should barely leave the floor. The V-step is a rotation, not a hop. If you are jumping, you are working far harder than the dance requires and you will never build the speed.
Once the slow version is clean, add a small sideways travel: instead of swivelling in place, let each swivel carry you a few centimetres to the left, then practise the same thing travelling right. Most people find one direction noticeably easier. Drill the awkward one twice as much.
Step 2: The Shuffle
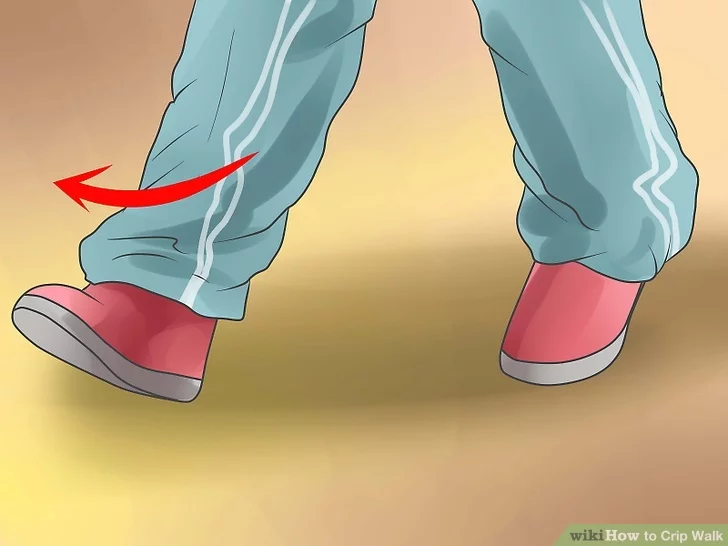
The shuffle is where the dance starts to look like the dance. It is a fast alternating switch that fills the space between V-steps.
The position: plant one foot flat, and extend the other out on the ball of the foot, roughly shoulder width away, with a slight bend in both knees.
The movement: with a small push off the planted foot, switch which foot is planted and which is extended. The extended foot comes in and takes the weight; the planted foot goes out onto its ball. Then switch back. The lift is minimal — a couple of centimetres of clearance, no more.
How to drill it: start at a pace where you can clearly see each position, then speed up gradually until the switch blurs. The mistake to watch for is bouncing vertically. The energy should go sideways, not up. A useful check: film yourself for ten seconds from the front. If your head is visibly rising and falling, you are jumping the shuffle rather than switching it, and that is what makes a beginner's shuffle look heavy.
Keep your upper body out of it. Shoulders relaxed, arms loose at your sides. The temptation is to counterbalance with the arms, which turns a footwork move into a whole-body lurch.
Step 3: The Heel-Toe
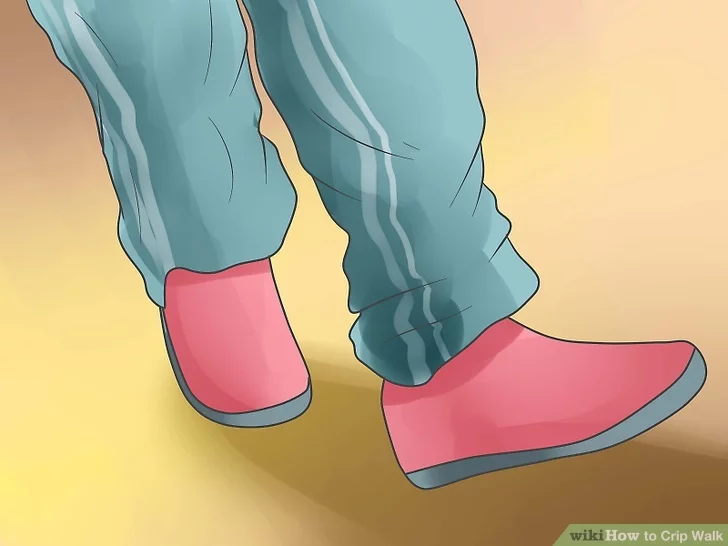
The heel-toe is the hardest of the three for most beginners, because it asks for balance on two very small contact points at once.
The position: front foot resting on its heel with the toe lifted; back foot resting on its toe with the heel lifted.
The movement: swivel from that position to change direction, then hop lightly to switch which foot is front and which is back, landing in the mirrored heel-toe position. Repeat, alternating.
How to drill it: forget the switch at first. Just get into the heel-toe position and hold it for five seconds. Then swivel the position ninety degrees and hold again. Only when you can hold and rotate without wobbling should you introduce the hop. Trying to learn the switch before you own the position is the single most common reason people give up on this step.
Rhythm matters more here than in the other two moves. The heel-toe has an obvious click to it when done right, and if your timing is uneven it reads immediately as wrong even to a viewer who has never danced. Count it out loud while you practise.
Step 4: Putting It Together
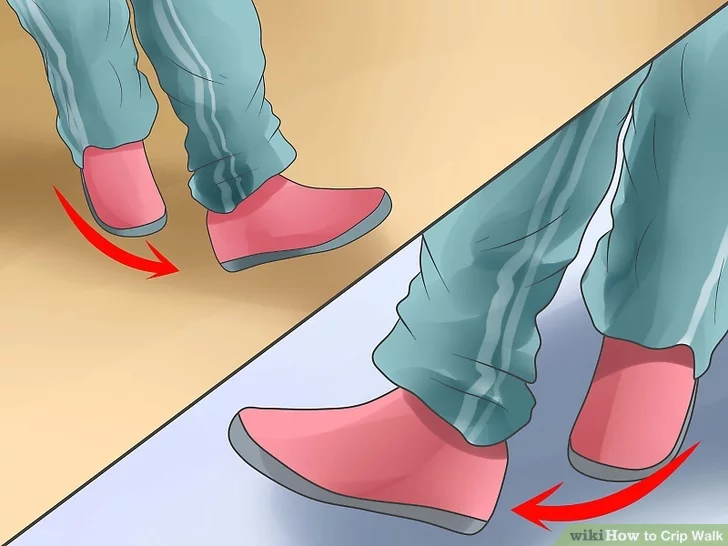
A combination is just moves plus transitions, and the transitions are the part nobody practises. Start with the simplest possible chain: four V-steps travelling left, four shuffles, four V-steps travelling right. Run it until it is boring. Then swap the shuffles for heel-toes. Then alternate all three.
Traditionally, the footwork was used to trace out the letters C-R-I-P on the ground, and that lettering is where the dance's name and its original meaning come from. Most dancers today treat the V-step and shuffle as pure footwork rather than spelling anything out, but it is worth knowing that the lettering is the historical root of the move — see our Crip Walk vs Blood Walk comparison for how the rival B-Walk built a different set of shapes from the same idea.
When you chain moves, the goal is that a viewer cannot tell where one ends and the next begins. That means you should be practising the joins specifically: run V-step into shuffle twenty times in a row on its own, then shuffle into heel-toe twenty times. Dancers who look smooth are not doing harder moves than you. They have drilled the seams.
A Four-Week Beginner Practice Plan
Fifteen to twenty minutes a day beats two hours on a Sunday. The dance is a motor skill, and motor skills consolidate through frequency rather than duration.
Week 1 — V-step only
Ten minutes of slow V-steps in place, five minutes travelling left, five minutes travelling right. No music for the first three days, then add a slow track. Goal: both feet turning on the same beat, no hopping.
Week 2 — Add the shuffle
Five minutes of V-step warm-up, then ten minutes of shuffle drilling, then five minutes alternating between the two. Goal: a shuffle with no vertical bounce, and a clean V-step-to-shuffle transition.
Week 3 — Add the heel-toe
Five minutes warm-up on the first two moves, ten minutes on heel-toe holds and rotations, five minutes attempting the switch. Expect this week to feel like a step backwards. It is the hardest move and it takes the longest.
Week 4 — Combinations and speed
Build the four-four-four combination, then drill the transitions in isolation. Only now start pushing tempo. Film yourself at the start and end of the week — the difference is usually much bigger than it feels from the inside.
Common Beginner Mistakes
Locked knees. The most common problem by a wide margin. Straight legs force the movement up into the hips and make everything look rigid. Keep a soft bend at all times.
Jumping instead of swivelling. If your head bobs, you are hopping. The Crip Walk is close to the floor. Height is wasted energy and it caps your maximum speed.
Tense arms. Beginners hold their arms out like a tightrope walker. Let them hang and swing loosely with the rhythm; the balance you think you are gaining from stiff arms is costing you all of your flow.
Chasing speed too early. Speed is an output, not an input. A slow clean V-step becomes a fast clean V-step on its own. A fast sloppy one stays sloppy forever because you are drilling the sloppiness.
Learning from a single clip. A short video shows you the finished product, not the weight shifts underneath it. Slow it to quarter speed and watch only the feet, one foot at a time.
What to Practise To
Tempo is what matters, not genre. Aim for roughly 90–100 BPM while you are learning, which is slow enough that you can see your own errors, then move up toward 100–115 BPM as the moves settle. West Coast hip-hop from the late nineties and early two-thousands sits naturally in that range, which is part of why the dance and that era of music are so tied together — Snoop Dogg's C-Walking is the reference point most people picture, and his catalogue is a reasonable place to start drilling.
A practical trick: use a metronome app for the first two weeks instead of music. Music has fills and drops that mask timing errors, whereas a metronome is merciless. Once your V-step is locked to a click, moving to a track feels easy.
Before You Post It
Plenty of people learn this dance for TikTok, and the footwork itself is not illegal and not inherently offensive. But the Crip Walk is not a neutral dance move in the way a shuffle or a two-step is. It originated among the Crips in Los Angeles in the early 1970s, and in some contexts and some places it still reads as a gang signal rather than as dancing.
In practice that means context does the work. Practising at home, dancing in a class, or performing it as choreography is very different from doing it in a specific neighbourhood or aiming it at a specific person. Serena Williams was widely criticised for it after her 2012 Olympic gold, and the debate that followed is a good illustration of how much the setting changes the reading. If you plan to post, it is worth ten minutes to understand that history first: we cover it in is the Crip Walk offensive or illegal.
Conclusion
Three moves, drilled slowly, in flat shoes, on a smooth floor. That is genuinely all there is to learning how to Crip Walk. The V-step gives you the foundation, the shuffle gives you the momentum, the heel-toe gives you the texture, and the transitions between them are what separate someone who knows the steps from someone who can actually dance.
Give it fifteen minutes a day for a month before you judge your progress. Almost everyone who thinks they cannot do this dance quit somewhere in week three, on the heel-toe, which is precisely the point where it was about to start working.
Frequently Asked Questions
How do you Crip Walk for beginners?
Start with the V-step and nothing else. Put your heels together with your toes pointing out to form a V, then swivel on the balls of your feet so the toes come together and the heels point out, forming an inverted V. Alternate those two shapes slowly until the swivel feels automatic. Only after the V-step is smooth should you add the shuffle, then the heel-toe. Most beginners fail because they try to copy a full combo on day one instead of drilling one movement until it stops requiring thought.
How long does it take to learn the Crip Walk?
With 15 to 20 minutes of daily practice, most people get a clean V-step in about a week, add a usable shuffle in two to three weeks, and can string together a short flowing combination in roughly four to six weeks. Speed comes last. Dancers who look effortless have usually spent months smoothing transitions, not learning new steps.
What shoes are best for Crip Walking?
Flat, smooth-soled shoes with a low profile work best because the dance is built on swivels. Classic canvas or leather skate shoes and low-top basketball shoes are common choices. Avoid running shoes with thick grippy treads and flared heels, which catch on the floor and make the pivot jerky. Whatever you wear should let the ball of your foot rotate without sticking.
What surface should I practise the Crip Walk on?
A smooth hard floor is ideal: wood, sealed concrete, linoleum, or a smooth garage floor. Carpet is the worst surface to learn on because it stops the swivel dead and can twist your knee. Avoid wet or polished-slick floors as well, since the dance involves quick weight shifts and you need predictable grip.
Why does my Crip Walk look stiff?
Almost always because of the upper body and the knees. Beginners lock their knees and hold their arms rigid, which forces the movement to come from the hips and makes every step look forced. Keep a soft bend in the knees, let the arms hang loose and swing naturally with the rhythm, and keep your weight on the balls of your feet rather than sitting back on your heels.
Is it OK for anyone to learn the Crip Walk?
Learning the footwork is not illegal and is not inherently offensive, but the dance carries a specific history tied to the Crips in Los Angeles, and context matters a great deal. Doing it as a dance in a class, at home, or in a social setting is very different from performing it in a neighbourhood where it will be read as a gang signal. Know the history before you post it.
References
- Wikipedia. "Crip Walk." en.wikipedia.org
- SFC of Dance. "Crip Walk (C-Walk) — Dance Terminology Glossary." sfconservatoryofdance.org
- Crip Walk Dance Portal. Complete Tutorial List